Rotating spiral post processing effect
As you migth know, Unity´s post processing has changed along with scriptable pipelines. Adding custom post processing effects requires a little bit scripting. For this, I recommend you to watch this Code Monkey’s video from YouTube.
Spiral math
This spiral effect was a result of playing around with basic blit. Since my math is a bit rusty, my first stop was to check out wikipedia about spirals. There are listed different spiral variations, from witch I stuck with the classic Archimedean spiral:
![\[r = a + b\theta\]](https://www.htainio.fi/wp-content/ql-cache/quicklatex.com-704aee1f5254c524467602bebd1260ee_l3.png "Rendered by QuickLaTeX.com")
In this equation, constant variable a shifts the spirals starting point away from center. − I didn’t want that, so I ditched it altogether :). Variable b is a constant, that dictates the hiatus between the grooves of the spiral. Spiral’s radius r increases as spiral moves away from the center. So, when we divide the radius with constant b, we can tell the direction from the center to the point on the spiral at that length (and because we already have the radius, we can derive the vector position also).
The spiral shader uses UV space to calculate the direction and the distance from the center to each pixel (and because we are in UV space, the center point is 0.5, 0.5). Using the spiral equation, we can compare each UV point position to the point position on the spiral at that same distance from the center. If the distance between these two points is within a set spiral width value threshold, it’s on the spiral and vice versa.
The graph
For creating the spiral shader, I used Amplify Shader Editor but this could be done with Unity’s Shader Graph as well. I wanted to use this effect as a blit post process effect and for this purpose, 2D Unlit shader type workflow is sufficient. I wanted following features to this effect:
- Spiral pattern drawn over the camera rendering
- The pattern rotates
- The blit effect’s blend value ping pongs linearly between given min and max values.
- Most of the values can be modified via material.
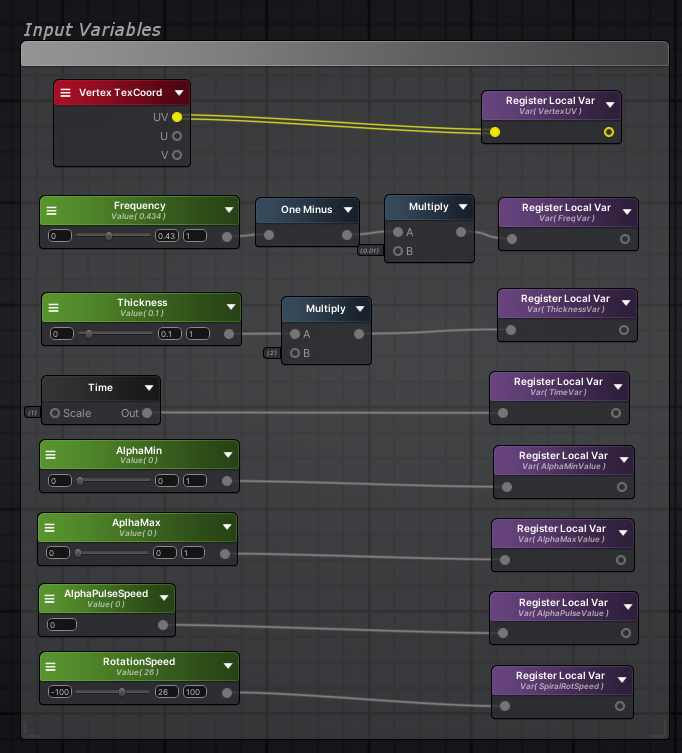
The inputs
I gathered all the input values to one block. Nothing special here, all we need are the vertex UV coordinates and some modifier parameters. Frequency determines the frequency of the spiral grooves (and for a better usability, the input goes from 0 to 1, then the value is inverted and multiplied by 0.01). The spiral’s thickness input goes from 0 to 1 as well and is multiplied by 2. I found these values working quite nicely.
Next, there is the time value that we use for rotating the spiral and for ping ponging the blend value. AlphaMin, AlphaMax and AlphaPulseSpeed variables relate to blending. Lastly, RotationSpeed variable controls the spiral rotation and it goes from -100 to 100.
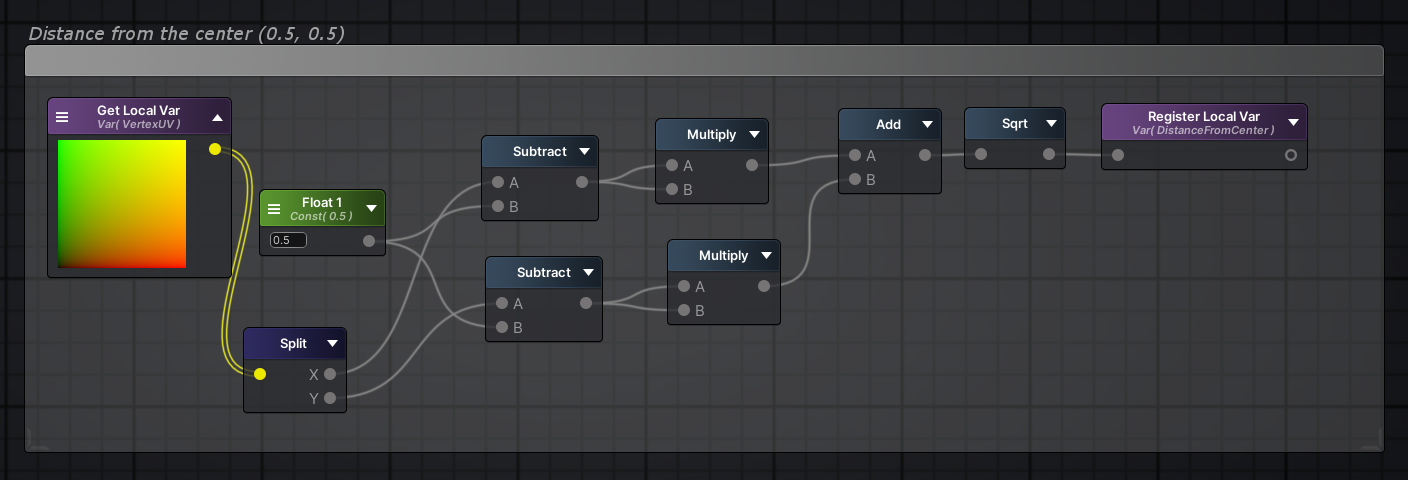
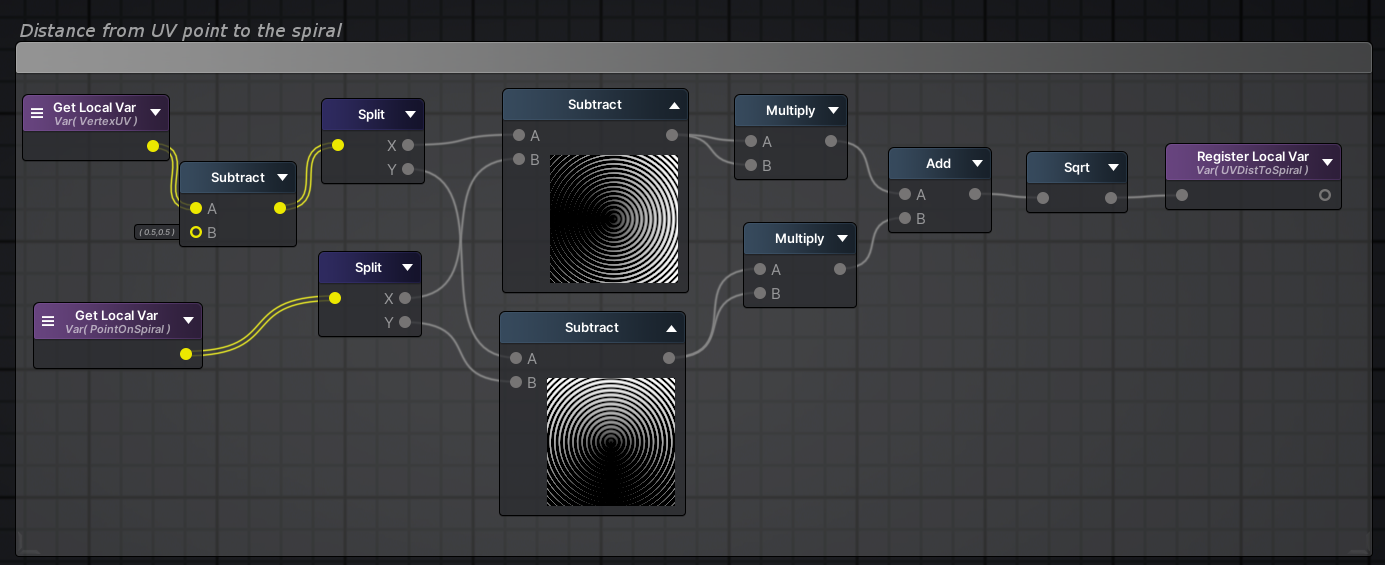
Distance from the center
First off, we need to calculate UV points distance from the center (which in UV space is 0.5, 0.5):
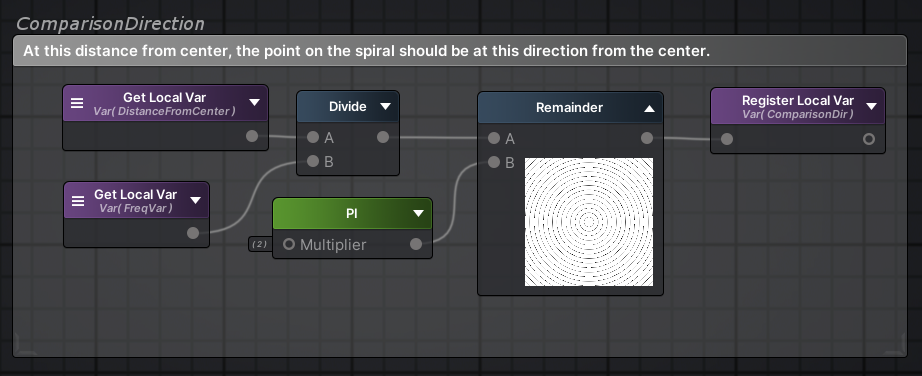
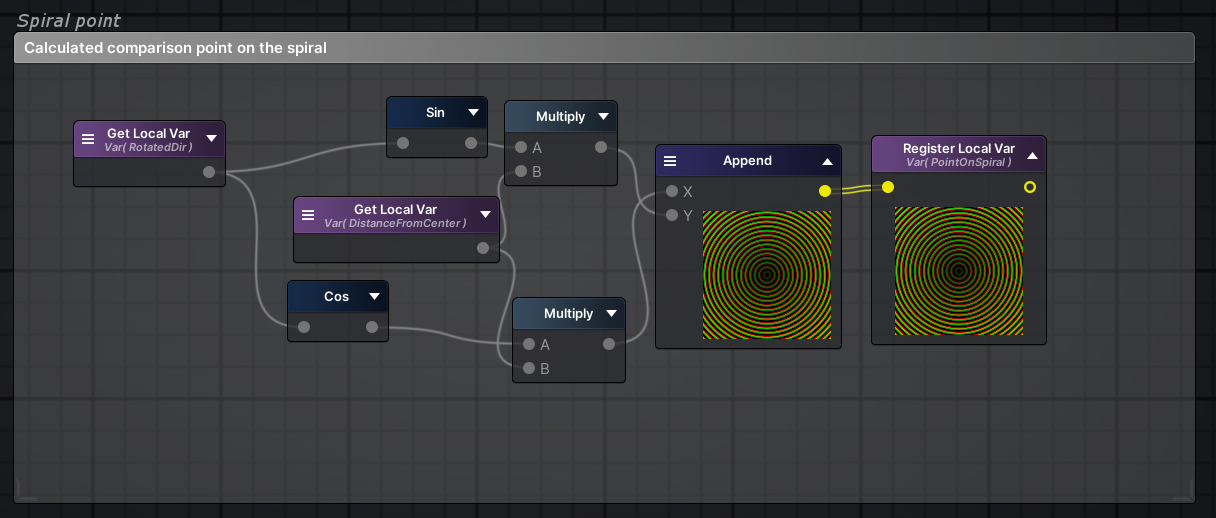
Comparison point and adding rotation
Next, the UV point’s distance from the center is used to calculate the direction where the point on the spiral with the same distance from the center should be.
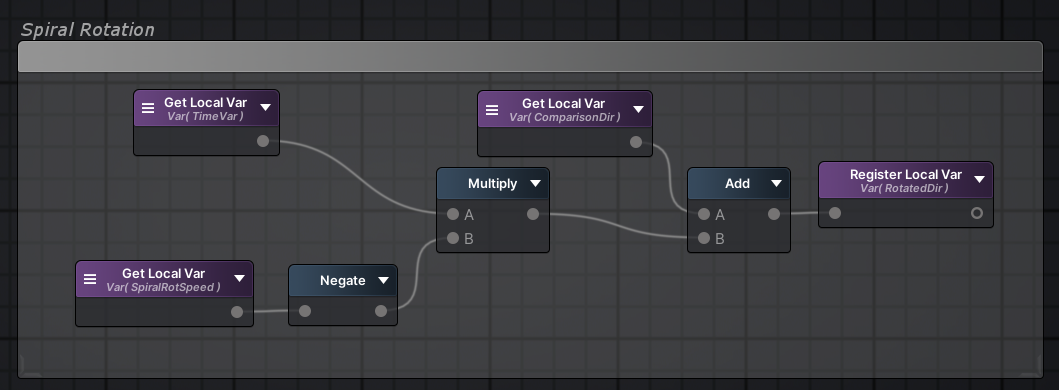
To make the spiral pattern rotate, time based rotation is added before calculating spiral point’s vector values:
Finally, the vector position of the comparison point on the spiral is calculated:
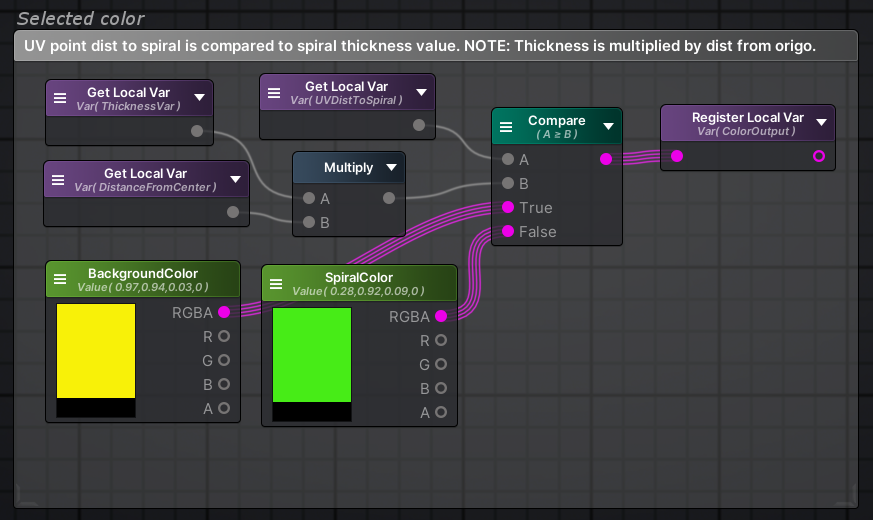
On spiral or not
Now it’s possible to calculate the distance between the UV point and where the point at the same distance from the center should be:
Thickness parameter determines if UV point is within the treshold to be considered to be on the spiral or not, and with this information the color is decided. (Note that thickness value is relational to the distance from the center.)
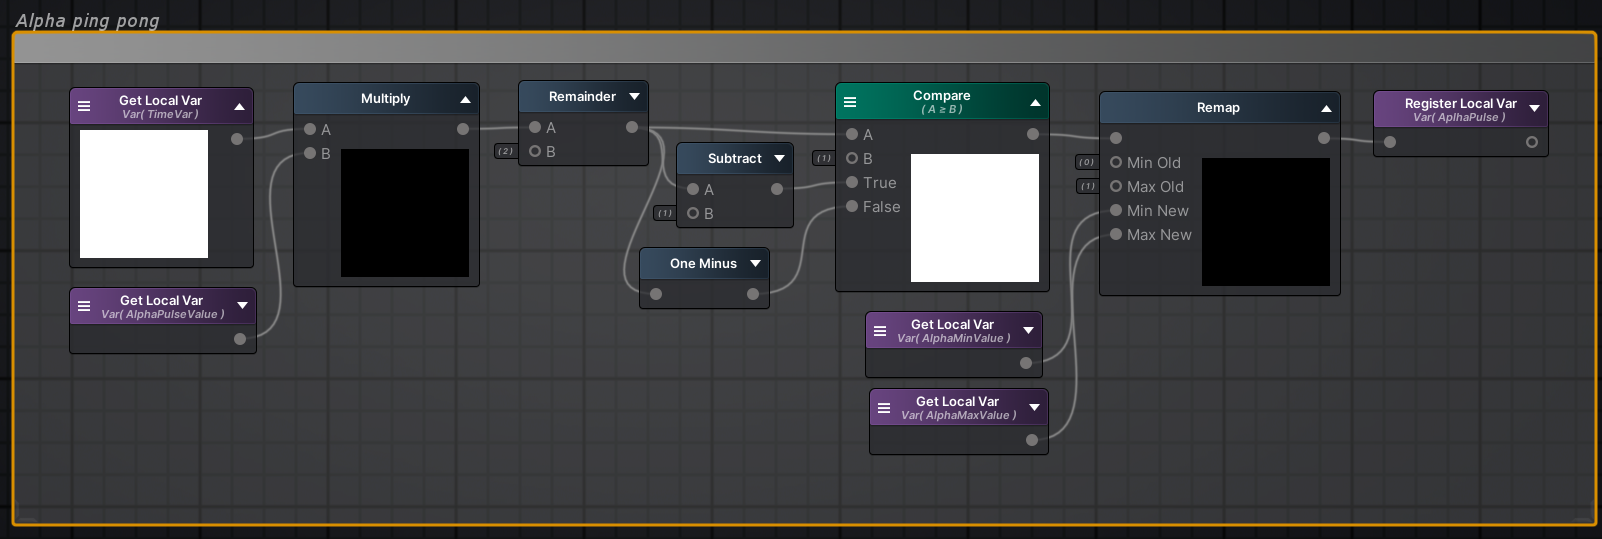
Blend pulsation
Before applying the color to the output mix, there is a calculation for pulsating alpha blend effect and I wanted it to be a linear ping pong movement:
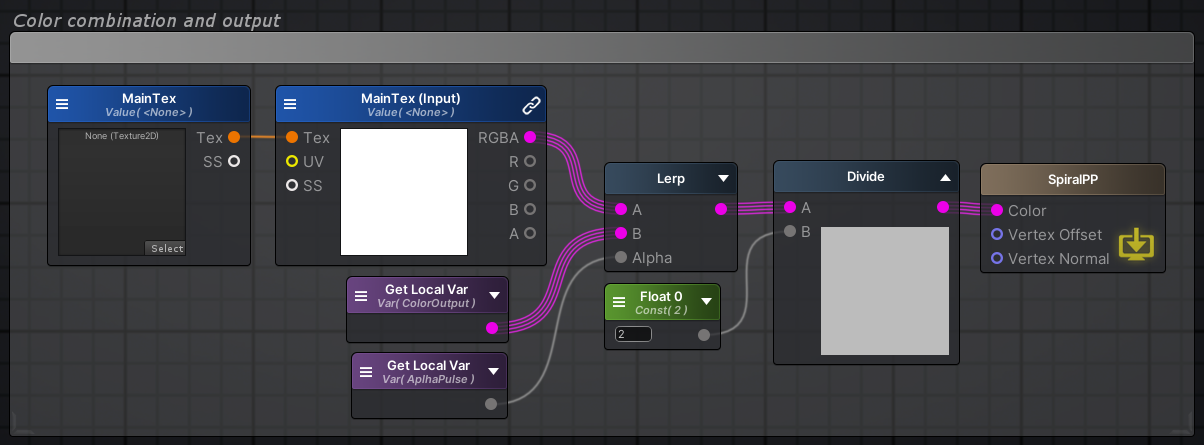
Output
Finally, the blit color is blended to the rendering using the alpha blend value. Since we only use the color output, 2D Unlit shader types outputs are sufficient.
And that’s it. You can customize most parameters from the material to suit your needs.
Thank you for visiting!